
")
So, you’ve just unboxed your brand-new ResMed AirMini AutoSet Travel CPAP Machine. It’s exciting, right? However, that little powerhouse operates a bit differently than your bedside machine, requiring a specific mask and setup pack to get started. Don’t worry, this guide is here to walk you through every step, from humidification to app control, so that you can get started with confidence.
We wrote this guide because we’ve been there, and we want to make this process simple for you. We’ll cover exactly which accessories you need, how to choose the correct mask setup, and even how to use a non-compatible mask with an adapter. We’ll also delve into the genius of its waterless humidification and get you set up with the AirMini app. Think of it as practical advice from one CPAP user to another. And if you’re a visual learner, you can follow along with our expert step-by-step YouTube video demo. Watch it here.
Here’s a quick look at what you’ll learn:
The AirMini only works with select ResMed masks or with a special adapter for standard CPAP masks.
You’ll need a specific setup pack depending on your mask type.
HumidX™ cartridges provide waterless humidification for most nasal masks.
The AirMini app controls pressure, comfort settings, and sleep data via Bluetooth.
Travel-friendly features make it easy to bring your CPAP therapy anywhere.
The AirMini doesn’t include tubing or a mask, so choosing the right pack is essential.
What Do You Need to Set Up the AirMini?
Before you can enjoy that quiet, travel-friendly therapy, you need to make sure you have the right gear. Think of this as your essential checklist.
Here’s what you’ll need:
The AirMini device itself
A compatible CPAP mask
The correct AirMini Setup Pack for your mask
AirMini-specific tubing (or a universal adapter if you want to use standard tubing)
A power source (your AC wall outlet or an optional travel battery)
Optional: A HumidX™ or HumidX™ Plus cartridge for waterless humidification
The All-Important AirMini Setup Pack
Here’s the key thing to remember: the AirMini is a bit of a specialist. It doesn’t work with just any universal mask or hose right out of the box. To get everything connected, you need a specific Setup Pack that’s designed to match your mask. These packs include the necessary connectors and tubing.
Some of the common setup packs you’ll see are:
<
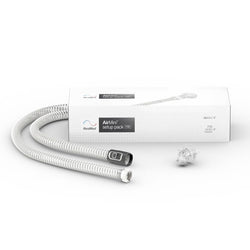
ResMed AirMini Setup Pack for N20 CPAP Mask
The ResMed AirMini Setup Pack for the N20 CPAP Mask comes pre-assembled with a long breathing tube and a specialized elbow adapter that easily connects your N20 nasal mask to the AirMini.
Included are two HumidX™ waterless humidifier filters (Standard & Plus), designed to offer effective humidification without the need for water, making it perfect for travel. The HumidX filter fits between the mask and the machine, providing comfortable moisture control throughout the night.
*Note: This setup pack does not include the N20 mask itself.
ResMed AirMini Setup Pack for F20 & F30 Full Face Masks
Designed specifically for AirFit F20, AirTouch F20, and AirFit F30 masks, this kit includes everything you need to ensure compatibility with your AirMini device.
F20/F30 connector
AirMini breathing tube
This setup pack is pre-assembled, so all you have to do is connect it to your mask and AirMini machine, and you’re ready for a comfortable night of therapy.
SAVE 20%
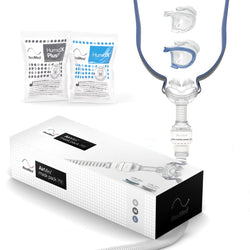
AirMini Mask Setup Pack with Airfit P10 Nasal Pillow Mask
Arrivederci, water-based humidification!
The AirMini™ P10 Nasal Pillow Mask Pack is designed with a special venting to allow proper moisture collection in the included HumidX™ waterless humidification units. Welcome convenience and dry-free comfort for a pleasant sleep therapy experience.
This version of the AirFit™ P10 is compatible with the AirMini™ Travel CPAP only.
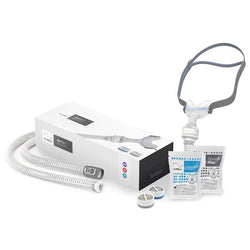
ResMed AirMini Setup Pack for N30 CPAP Mask
The ResMed AirMini Setup Pack for the N30 CPAP Mask is exclusively designed for use with the AirMini CPAP machine and includes everything you need to get started:
AirFit N30 Nasal Mask (with all three sizes of nasal cushions: Small, Medium, and Small-Wide)
AirMini Tubing
HumidX and HumidX Plus waterless humidification capsule’s
*Note: This setup pack is only compatible with the ResMed AirMini.
Want to Use Your Own Gear? You Have Adapter Options
But what if you love your current standard mask or tubing? Good news: you have options! ResMed made two clever adapters to give you more flexibility:
For using standard tubing: The AirMini Tubing Adapter connects your AirMini machine to a standard 22mm (the thicker, more common kind) CPAP tube. While the AirMini is designed for its own slim 15mm AirMini flexible tubing, this adapter lets you use what you’re already used to.
For using a standard mask: The AirMini Mask Adapter is what you need if you want to connect almost any standard 22mm CPAP mask to the original, slim AirMini tubing. This is the perfect solution if you want to keep the lightweight AirMini hose but use your favorite non-ResMed mask.
A Quick Word on Waterless Humidification
One of the AirMini’s best travel features is its waterless humidification. Instead of a bulky water tank, it uses small, disposable cartridges that capture moisture from your breath. If you want this feature, you’ll need one of these:
Just remember, these cartridges are mask-specific, so you can’t use them with every mask type.
The AirMini-Specific Tubing
The standard hose that comes in the setup packs is the AirMini Travel CPAP Flexible Tubing. You’ll notice it’s much thinner and more flexible than standard hoses, which is great for reducing drag and packing light. It only works with AirMini-compatible masks or when you use one of the adapters we just discussed.
Finally, if you like to have all the official details straight from the source, we always recommend keeping the AirMini User Guide (PDF) handy. It’s a great reference for double-checking components and specifications.
Which Masks Work With the AirMini?
This is probably the #1 question we get about the AirMini: “Can I use my current mask?” It’s a fair question, but the short answer is usually “not without a little help.” The AirMini uses a unique connection system designed for its slim tubing and clever HumidX waterless humidifiers. Because of this, it only works directly with a select group of ResMed masks.
Let’s break down exactly which ones are compatible and what you need to make them work. And for the fine print, you can always refer to the official AirMini CPAP Machine User Guide for more details on compatibility.
Nasal Masks
AirFit N20 (requires special adapter setup): A super popular and comfortable choice. To use it, you’ll need the AirMini Setup Pack for N20 CPAP Mask. This kit comes with the special tubing and HumidX cartridges, but keep in mind, it does not include the AirFit N20 mask itself.
AirFit N30 (bundle only): One of the simplest options for getting started. This mask comes as an all-in-one kit, the AirMini Setup Pack for N30 CPAP Mask, which includes the mask, headgear, tubing, and HumidX cartridges. No separate purchases are needed here.
Nasal Pillow Masks
AirFit P10 (special version required): Another complete package designed specifically for the AirMini. The Mask Setup Pack with AirFit P10 Nasal Pillow Mask is a special version of the P10 that connects directly. It includes everything: the mask, the hose, and both standard and Plus HumidX cartridges.
Full Face Masks
If you’re a full-face mask user, you have a few great options. The AirFit F20, the AirTouch F20 (with its comfy memory foam cushion), and the AirFit F30 (a minimal-contact design) are all compatible. To connect any of these, you’ll need the AirMini Setup Pack for F20 & F30 Full Face Masks. Just like the N20 pack, this kit provides the correct tubing and connector but does not include the actual mask.
To make things even easier, you can often find complete bundles that package everything together. For example, the AirFit N20 Complete Mask & AirMini Mask Setup Pack Bundle gives you both the mask and the setup kit in one go.
Quick Compatibility Chart
For a quick summary, here’s a simple chart:
A Quick Heads-Up: It’s really important to stick to the officially compatible masks and setups listed here for a direct connection. Trying to force a standard, non-compatible mask or tube onto the AirMini without the proper parts can lead to leaks and frustration. (We’ll talk about how to use other masks with special adapters in the next section!)
If you’ve got the right parts but are still running into issues getting a good seal, the AirMini Troubleshooting Guide is a fantastic resource for quick fixes.
How to Set Up the AirMini With a Compatible Mask
So, you’ve got all your gear ready to go! This is the fun part: putting it all together.
Follow these simple steps to set up your AirMini using one of the officially compatible masks and its matching setup pack.
Your Step-by-Step Assembly Guide
Grab Your Mask and Matching Setup Pack: First things first, have your compatible mask (AirFit N20, N30, P10, F20, AirTouch F20, or F30) and the correct setup pack right in front of you. This is the most crucial step to ensure everything fits perfectly.
Confirm you have the correct AirMini Setup Pack:
Connect the Tubing: Unpack the flexible AirMini tubing. One end connects directly to the air outlet port on the side of the AirMini machine; you should feel it click securely into place. The other end will connect to your mask using the specific connector that came in your setup pack.
Install the HumidX™ Cartridge (Optional): Want that waterless humidity? Now’s the time. Before connecting the tube to your mask, open the connector piece.
Power It Up: Plug the AirMini power cord into the back of the device and then into a wall outlet. A small white light will turn on, letting you know it’s ready.
Connect to the App: The final step is pairing your AirMini with its smartphone app via Bluetooth. This is how you’ll control all your settings, start and stop therapy, and track your sleep data. (Don’t worry, we’ll dive deep into the app in the coming sections!)

Stuck? A Few Quick Setup Tips
Even with the right parts, sometimes things don’t go perfectly on the first try. Here are a few common hiccups and quick fixes:
Feeling a Draft? If you feel air leaking, the first thing to check is your mask seal. Make sure it’s sitting correctly on your face and the headgear is snug but not too tight.
Is It Really Connected? The AirMini tubing and connectors are designed to ‘click’ into place. If you’re not sure, disconnect and reconnect both ends, listening for that satisfying click to confirm a secure fit.
HumidX Not Seated? Make sure the HumidX cartridge is sitting flat inside its housing before you snap the connector shut. An improperly placed cartridge can cause leaks.
For anything more complex, keeping the AirMini User Guide nearby is always a smart move. If that doesn’t solve it, the official AirMini Troubleshooting Guide is your best friend.
What If You Want to Use a Non-Compatible Mask?
So, what if you absolutely love your current mask and don’t want to switch? We get it. Whether it’s for comfort, a perfect fit, or just habit, sometimes you want to stick with what you know. While the AirMini is designed for its own ecosystem, there is a reliable workaround to use your favorite standard CPAP mask.
The solution involves using a special adapter to bridge the gap between the AirMini and standard CPAP gear. It’s a straightforward setup, but it’s important to know the trade-offs upfront: this custom configuration does not support the AirMini’s built-in HumidX™ waterless humidification. You’re trading that feature for the flexibility of using your own mask.
What You’ll Need for a Custom Setup
To make this happen, you’ll need a few specific items. Here’s your shopping list for the most common custom setup:
An AirMini Tubing Adapter. This is the key piece that connects the machine to a standard hose.
An AirMini Mask Adapter, which lets you connect a standard mask to the original slim AirMini tubing.
A standard 22mm CPAP tube (if you prefer it over the slim AirMini tube).
Your preferred standard CPAP mask (nasal, nasal pillow, or full face).
Step-by-Step Custom Assembly
Putting it together is quick and easy:
Attach the Tubing Adapter: Connect the AirMini Tubing Adapter to the air outlet port on the side of your AirMini. You should feel it click into place.
Connect Your Standard CPAP Hose: Attach your standard 22mm CPAP tube to the other end of the adapter.
Connect Your Mask: Attach the other end of the tube directly to your mask, just like you would with your home CPAP machine. If you’re using the original AirMini tubing instead, attach the AirMini Mask Adapter to the end of the tube before connecting your mask.
Power On: Plug in your AirMini and start your therapy through the app as usual.

Important: What You Give Up With a Custom Setup
Using a non-compatible mask is a great option for flexibility, but be aware of these limitations:
No HumidX™ Support: This is the biggest one. The waterless humidification system only works with the official compatible mask setups.
App Data May Vary: The AirMini app is calibrated to deliver and report data based on its own masks and tubing. While your therapy will work, the reported pressure or leak data might not be perfectly accurate.
Fit and Pressure Consistency: While generally reliable, the pressure delivery might feel slightly different compared to an officially supported setup.
Finally, a quick note on safety. Before going all-in on a custom setup, it’s always a good idea to check in with your sleep specialist to ensure it will meet your therapy needs. For any technical questions, the official AirMini User Guide remains your best source for detailed specifications.
How to Add Humidification Without Water
One of the absolute best features of the AirMini, especially for travelers, is its ability to provide humidification without a drop of water. This is all thanks to the clever HumidX™ waterless humidification system. It replaces the need for a clunky water tank by using tiny, disposable cartridges, saving you the hassle of packing and finding distilled water on the go.
How Does Waterless Humidification Work?
So, how does it work? It’s based on a simple but brilliant technology called Heat and Moisture Exchange (HME). The small HumidX cartridge sits between your mask and the tube. When you exhale, it captures tiny particles of heat and moisture from your breath. Then, when you inhale, it releases that same heat and moisture back to you, keeping the air you breathe comfortable and preventing dryness. No water, no mess—just smart science.
ResMed offers a few different HumidX options depending on your needs and your mask type:
Product | Best For | Compatibility | Link |
HumidX™ Standard | Normal environments and everyday use. | AirFit P10, AirFit N20, AirFit N30 | HumidX Standard Waterless Humidifier |
HumidX™ Plus | Dry climates (like airplanes or deserts) or for users who need extra moisture. | AirFit P10, AirFit N20, AirFit N30 | HumidX Plus Waterless Humidifier |
HumidX™ for AirFit/AirTouch F20 | Full face mask users who want humidification on the go. | AirFit F20, AirTouch F20 (not compatible with F30) | HumidX for AirFit/AirTouch F20 |
Important Note on Compatibility: HumidX cartridges are not one-size-fits-all. The Standard and Plus versions only work with the compatible nasal and nasal pillow masks listed above. And if you use a full face mask, please be aware that the AirFit F30 is not compatible with any HumidX model.
Popular Humidifiers
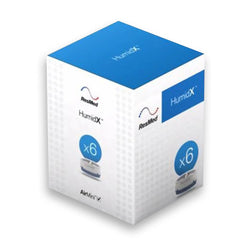
HumidX Standard Waterless Humidifier for AirMini
The ResMed HumidX is a disposable waterless humidifier for AirMini™ CPAP machine designed for dry environments. Must be replaced within 30 days of opening (1, 3 or 6 pack).
HumidX is a waterless humidifier that’s designed to provide you with more comfort by retaining the moisture and heat in the air you breathe, and offering relief from possible dryness and congestion. When you exhale, heat and moisture is captured and stored within the HME’s tiny paper ridges. When you inhale, this heat and moisture is released to humidify the air you breathe in.
HumidX can be inserted directly between the mask connector and the vent, providing effective waterless humidification at a compact, effective and comfortable level. It is suitable for normal/average conditions of medium to high humidity, and medium to high temperatures.
SAVE 67%
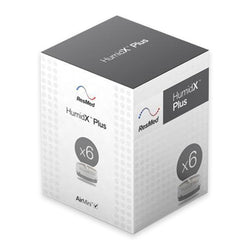
HumidX Plus Waterless Humidifier for AirMini
The ResMed HumidX Plus is a compact, waterless humidifier designed for the AirMini™ CPAP machine. It captures heat and moisture as you exhale, then releases it back into the air as you inhale, keeping your therapy comfortable and helping prevent dryness and congestion.
The waterless humidifier is simple to use, it fits snugly between the mask connector and the vent, providing effective humidification without the need for water. Available in packs of 1, 3 or 6, with each unit needing replacement within 30 days of opening.
Only compatible with AirFit N20 and AirFit P10 for AirMini.
SAVE 64%
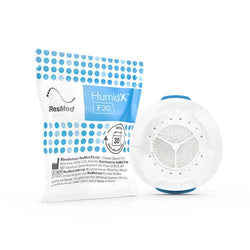
AirMini HumidX Humidifier for AirFit/AirTouch F20
Specifically designed for the AirMini™ travel CPAP machine and AirFit/AirTouch F20 full-face masks, these compact waterless humidifiers capture heat and moisture from every breath you exhale, releasing it back as you inhale. This keeps your airways moist, reduces dryness, and provides an easy-to-use, portable option without the distilled water or power.
Available in packs of 1, 3, or 6, each HumidX™ cartridge should be replaced every 30 days for optimal performance.
This product is NOT compatible with any other machine or mask.
SAVE 68%
Which Setups Include HumidX?
The good news is, if you bought one of the main compatible mask setups, you’re already good to go. The Mask Setup Pack with AirFit P10, AirMini Setup Pack for N20, and AirMini Setup Pack for N30 all come with HumidX cartridges included in the box.
Quick Installation Steps
Swapping out a cartridge is a 10-second job. Here’s how:
Gently twist and pull to disconnect the mask connector from the main AirMini tubing.
If there’s an old cartridge, pop it out. Insert the new HumidX cartridge, making sure it sits flat inside the housing.
Securely reconnect the two parts of the tubing until they click. You’re ready to go!
When to Replace Your HumidX
For the best performance and hygiene, you should replace your HumidX cartridge every 30 days after you open its sealed packaging. Try to handle it by the outer rim to avoid touching the inner material.
Pro-Tip for Optimal Comfort
Traveling to a dry place? Pack a HumidX™ Plus. It’s designed to provide that extra bit of moisture when the air is really dry, like on a plane.
Using an F30 mask? Just a friendly reminder that, unfortunately, no HumidX cartridges are compatible with the F30 mask setup.
How to Control and Adjust Settings With the App
One of the first things you’ll notice about the AirMini is its sleek, screen-free design. So, how do you control it? Everything is managed through the Bluetooth-connected AirMini app on your smartphone. This isn’t a drawback, it’s a huge plus! The app gives you a clean, easy-to-use interface to control your therapy, track your progress, and fine-tune your comfort settings right from your phone.
Getting Paired and Connected
Getting started is simple. First, download the free AirMini app from the Apple App Store (for iOS) or Google Play Store (for Android). Then, follow these quick steps to pair:
Make sure your AirMini is plugged in and the white light is on.
Turn on Bluetooth on your phone and open the AirMini app.
The app will scan for your device and guide you through the pairing process. Once connected, you’ll see a confirmation on the app’s dashboard.
Key Features at Your Fingertips
The app is your command center. Here’s a quick look at everything you can do:
Track Your Progress: View your nightly sleep score and dive into your 30-day therapy history to see how you’re doing.
Remote Control: Start and stop your therapy with a single tap directly from the app’s main screen.
Fine-Tune Comfort: Adjust your Ramp Time (how slowly the pressure builds up) and turn on Expiratory Pressure Relief (EPR) to make breathing out feel more natural.
Adjust Therapy Mode: Switch between AutoSet (variable pressure) and CPAP (fixed pressure), and adjust the minimum/maximum pressure range in AutoSet mode.
Check Your Fit: Run a mask fit check to make sure you have a good seal before you fall asleep.
How to Access the Advanced Therapy Settings
Need to get into the more advanced settings? It’s easy, but there’s a little trick to it. Here’s how you unlock the clinical menu:
Open the AirMini app and make sure it’s connected to your device (the Bluetooth icon should be blue).
Tap the Bluetooth icon at the top of the screen.
Here’s the secret: Press and hold two fingers on the ResMed logo at the top of the next screen for a few seconds.
Voila! The clinical settings menu will appear. From here, you can navigate to “Therapy” or “Comfort” to make adjustments based on your prescription.
A Quick Word of Caution: While it’s easy to change your pressure settings, you should always consult your doctor or sleep specialist before making any major adjustments to your prescribed pressure. However, feel free to tweak comfort settings like the ramp time or EPR level to see what feels best for you.
For most people, the default AutoSet mode is the way to go. Instead of staying at one fixed pressure, it intelligently adjusts up and down throughout the night based on your breathing needs. This usually leads to more comfortable and effective therapy.
If you encounter any issues with pairing or the app appears unresponsive, the AirMini Troubleshooting Guide offers a comprehensive section on Bluetooth connectivity to help you resolve the problem.
App Pro-Tips
Keep It Updated: Occasionally, check the app for firmware updates for your AirMini. These updates can improve performance and add new features.
Practice During the Day: Don’t wait until you’re tired and ready for bed to explore the app for the first time. Spend a few minutes during the day navigating through the menus to get comfortable with their location.
And if you’re a visual learner, don’t forget that the YouTube setup guide we mentioned earlier has a great walkthrough of the app pairing and settings adjustment process.
Travel Tips & Accessories
Traveling with a CPAP machine can feel like a hassle, but this is where the AirMini truly shines. It was built from the ground up to make your journey easier. It’s FAA-approved for in-flight use and so lightweight you’ll barely notice it in your bag, ensuring you never have to choose between packing light and getting a good night’s sleep.
Best Practices for Traveling With Your AirMini
To make your travels even smoother, here are a few tried-and-true tips from seasoned users:
Always keep your AirMini in carry-on luggage.
Use a dedicated travel case to protect the device from impact or dust.
Keep your setup pack parts organized (mask, tubing, HumidX, connector).
Consider backup filters and an extra HumidX cartridge.
Carry a copy of your prescription in case TSA or airline staff ask.
Bring a portable battery pack if traveling somewhere without guaranteed power access (though note the AirMini doesn’t come with a battery).
Must-Have Travel Accessories
The right accessories can take your travel setup from good to great. Here are some of the essentials:
Travel Accessories
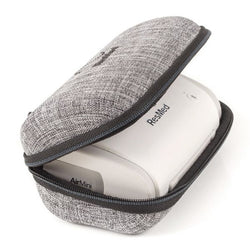
ResMed Travel Case for AirMini Portable CPAP Machines
The ResMed Travel Case is a compact protective case designed to hold the ResMed AirMini Portable CPAP Machine. Its form-fitting design keeps the device secure during transport, protecting it from scratches and minor impacts while keeping packing simple.Small enough to tuck in your bag, just the right size to carry what matters.
This case is intended only for the AirMini itself. For carrying additional items such as a CPAP mask, tubing, and other supplies, see the Premium Carry Bag for ResMed AirMini.
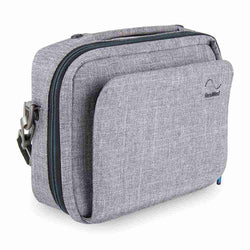
Premium Carry Bag for ResMed AirMini
The Premium Carry Bag for ResMed AirMini CPAP Machine is a travel bag designed to store and organize the AirMini CPAP machine, its accessories, and a mask. It has zippered compartments, padded dividers, and a hard shell section for the AirMini, helping keep equipment in place during transport.
It includes a handle, removable shoulder strap, and suitcase strap for different carrying options. Additional pockets can hold personal items such as travel documents or small electronics. For a dedicated protective case designed only for the AirMini device, see the ResMed Travel Case for AirMini Portable CPAP Machines.
Storage & Cleanliness on the Go
Keeping your gear in top shape on the road is easy:
Find a Stable Spot: When you set up in your hotel or rental, place the AirMini on a flat, stable surface like a nightstand to keep it from tipping over.
Clean on the Go: For quick daily cleaning of your mask, CPAP wipes are incredibly convenient.
Air It Out: Before you pack up to head home, make sure your mask and tubing are completely air-dried to prevent any mildew from growing in your bag.
Travel Pro-Tips
Pack for the Climate: Heading somewhere dry? Bring extra HumidX™ Plus cartridges. Going somewhere humid? The HumidX™ Standard might be all you need. Packing a variety gives you options.
Keep It Quiet: If your setup seems a bit noisy, double-check that the tubing is clicked in firmly at both ends. A secure connection is a quiet connection.
If you want to see what a complete travel-ready system looks like all packed up, the AirMini setup video offers a great visual guide and shares more tips on making your therapy quiet and comfortable, no matter where you are.
FAQs
What do I need to set up my AirMini?
To get started, you need four key things: the AirMini device, a compatible CPAP mask, the correct AirMini Setup Pack that matches your mask (this includes the special tubing and connectors), and a power source. For comfort, you can also add a HumidX™ waterless humidification cartridge, which is often included in the setup packs.
Can I use any CPAP mask with my AirMini?
Not directly out of the box. The AirMini is specifically designed to work with a select group of ResMed masks, like the AirFit P10, N20, N30, F20, and F30, using their corresponding setup packs. However, you can use most other standard CPAP masks by purchasing a special adapter that allows you to connect standard tubing to the AirMini.
How do I connect my mask to the AirMini?
You’ll use the specific tubing and connectors that come inside your AirMini Setup Pack. One end of the flexible tube clicks securely into the side of the AirMini machine. The other end attaches to a special connector (where the HumidX cartridge goes), which then clicks firmly onto your compatible mask.
How do I use humidification with the AirMini?
The AirMini uses a brilliant waterless system called HumidX™. Instead of a water tank, you simply insert a small, disposable HumidX cartridge into the connector piece of your tubing. This cartridge captures heat and moisture from your breath when you exhale and releases it back to you when you inhale, keeping the air comfortable and moist without any water.
What tubing and adapters do I need?
If you are using an officially compatible ResMed mask, you only need the special, lightweight tubing that comes included in your Setup Pack—no adapters are necessary. If you want to use a non-compatible or standard CPAP mask, you will need to buy the AirMini Tubing Adapter, which allows you to connect a standard 22mm CPAP tube to the device.
How do I adjust settings on the AirMini?
All adjustments are made through the AirMini app on your smartphone, which connects to the device via Bluetooth. You can easily change comfort settings like Ramp Time and Expiratory Pressure Relief (EPR). For more advanced pressure changes, you can unlock the clinical menu by holding two fingers on the ResMed logo within the app, but always consult your doctor before altering your prescribed pressure.
How do I use the AirMini app?
First, download the app and pair it to your AirMini using Bluetooth. Once connected, the app becomes your command center. You can use it to start and stop your therapy, check your nightly sleep score and usage data, run a mask fit test to check for leaks, and adjust all of your comfort and pressure settings.
What if I want to use my current mask?
You absolutely can! The most common way is to purchase the AirMini Tubing Adapter. This piece connects to your AirMini and allows you to attach any standard 22mm CPAP tube, which can then connect to your current mask. The only trade-off is that this custom setup is not compatible with the HumidX™ waterless humidification system.
How can I make the AirMini quieter?
Due to its small size, the AirMini can sometimes sound different than larger bedside machines. The best way to reduce noise is to ensure all connections are secure—listen for the “click” when attaching the tubing to the machine and the mask connector. Also, make sure your HumidX cartridge is seated properly, as a loose fit can cause small air leaks and noise.
What should I pack when traveling with the AirMini?
Always pack your AirMini and all accessories in your carry-on luggage. Your essential checklist should include the AirMini device, your mask and headgear, the specific AirMini tubing/connector, the power cord, and enough HumidX cartridges for your trip. It’s also smart to pack a spare filter, a copy of your prescription, and a protective travel case.
 – Amerisleep")


